Working with a 10-community college statewide advanced manufacturing workforce development initiative called the Advanced Manufacturing Alliance, which uses Joomla's Easyblog for their News & Updates, it became apparent that the participants needed some instructions on how to create their profiles on the site. Helping people posting to the platform from within the site helps to ensure their postings are more consistent, complete, and provides some context about the person posting, their credentials and their role within the initiative. This was particularly important to visitors from out of state, within the advanced manufacturing industry sector, or potential students interested in a career in advanced manufacturing.
Although Easyblog provides more options for enhancing a profile and provides additional detail and fields that can be important for other blog uses, the steps below provide the basic information needed to get a person's profile looking useful. The images below are from the Advanced Manufacturing Alliance site.
Instructions on how to create your profile
You will need a square-shaped image or head shot of yourself for your profile picture, so before you begin, I would suggest you find one suitable for the blog, edit it to fit and save it on your desktop. It should be dimensionally the same size across as tall - for example 160 pixels x 160 pixels and the maximum file size must be under 8 MB or you won't be able to upload it. A good size to aim for is about 350 x 350 pixels and around 300 KB. Easyblog will automatically resize it to fit at 160x160. A program that provides a simple way to crop and resize pictures is Microsoft Office Picture manager, which comes bundled with Microsoft Office and is in a folder on your Start Menu under Microsoft Office Tools.
First log in. Once you have logged in, navigate to your Easyblog extension.
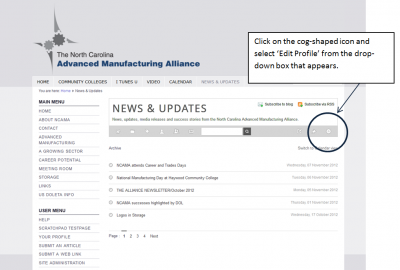
Adding your profile picture:
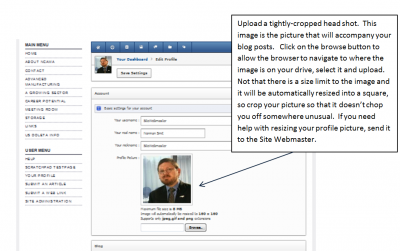
Once you've uploaded an image and you're happy with it, scroll down a little further to the section named Blog. In the section titled Short Biography, add a sentence or two about yourself. This short paragraph provides some context to readers who may not be familiar with who you are, your role, and why you are contributing to the blog. It should play a role in helping to showcase the multiple contributors to the blog, or in the instance of a single blogger, provide a short blurb about who you are. To avoid boring people, keep it reasonably tight. For technical blogs, information about credentials or your history is valuable.
(The following instruction is for an Easyblog being used within a multiple-party site.) In the field, Your website, provide a link back to the landing page that will provide you with the most value. Provide the full link, which includes the http://.... so that it is clickable and can be followed. Make sure to test it afterwards after everything is saved.
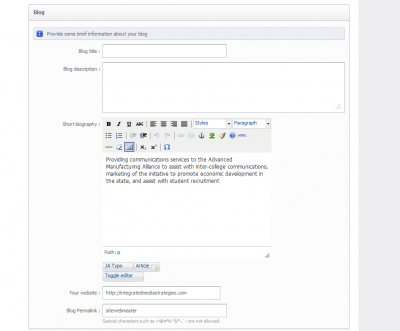
After adding the biography information and the link below it, remember to save your work!
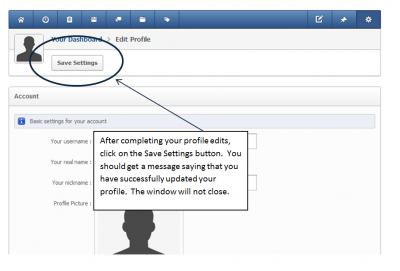
Once you have saved your profile, you can navigate back out of editing by clicking on the small house symbol in the blue Your Dashboard bar.
Subscribe